Test – Card Setup and Printing EPSON – Vertical Image Layout – Photoshop CC CS6 CS5
Card Setup and Printing – Vertical Image Layout – Photoshop CC CS6 CS5
Epson Setup
|
STEP 4 – CUSTOM PAPER SIZE Most recent driver versions look like this in Advanced Mode**. Find the drop down menu that has paper sizes. Find and click on the User Defined option. **If you do not see this menu arrangement, you are probably in Basic Mode. look for a button near the bottom right marked Advanced and click it to get to this screen.
|
 |
|
1. Fill in the Paper Width and Paper Height. Use the table below as your guide. Hint: The width is always the smaller dimension and the height is always the longer dimension of your paper, regardless of card orientation.
2. Paper Size Name – call it something that is easily recognizable 3. Click the Save button to return to the printer preferences / properties. 4. Click OK – You now have saved a custom paper size that will appear in your list of paper sizes. 5. Verify your other printer settings – media type, print quality, color management, and click OK to return to Photoshop. |

|
|
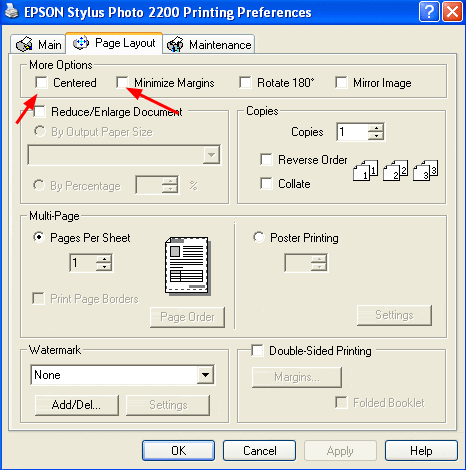
Note: This step is for older Epson printers On the Page Layout tab, click the Centered and Minimize Margins. |
|
STEP 5 – PRINTING
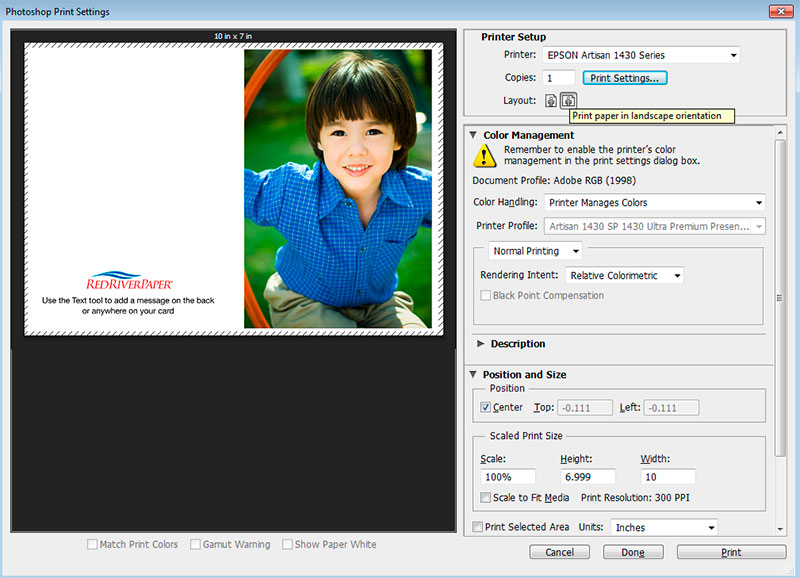
Notice that the preview screen looks like the printed card should – the excessive white space is gone. The hash marks around the border represent your printer’s margins.
|
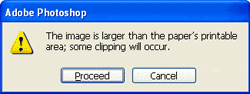
NOTE! Make sure orientation is set to LANDSCAPE. If not, you will notice that the Print with Preview will look wrong. You can now click print. You may see this warning – if so simply click proceed.
|
 |
Congratulations! You have set up and printed a Red River Paper greeting card.
Trouble shooting questions? Click here
Original Publication Date: ,
Article Last updated: January 28, 2016
Comments are closed.


Categories
About Photographers
Announcements
Back to Basics
Books and Videos
Cards and Calendars
Commentary
Contests
Displaying Images
Editing for Print
Events
Favorite Photo Locations
Featured Software
Free Stuff
Handy Hardware
How-To-Do-It
Imaging
Inks and Papers
Marketing Images
Monitors
Odds and Ends
Photo Gear and Services
Photo History
Photography
Printer Reviews
Printing
Printing Project Ideas
Red River Paper
Red River Paper Pro
RRP Newsletters
RRP Products
Scanners and Scanning
Success on Paper
Techniques
Techniques
Tips and Tricks
Webinars
Words from the Web
Workshops and Exhibits
all
Archives
March, 2024
February, 2024
January, 2024
December, 2023
November, 2023
October, 2023
September, 2023
August, 2023
May, 2023
more archive dates
archive article list


