Use Textures To Transform Your Photos Into Fine Art
By Nitsa Malik–
The fastest way to add a new dimension to a picture is to open your photo editor and insert an additional layer which contains texture on top of your original photo.
© Nitsa Malik
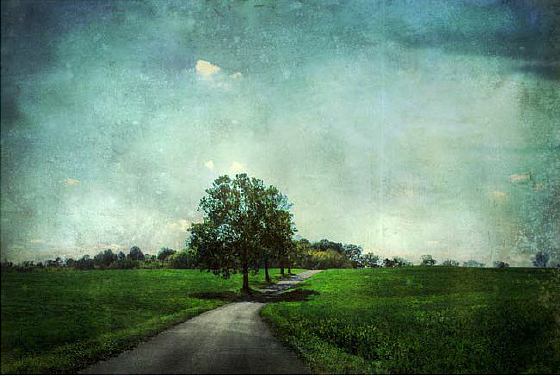
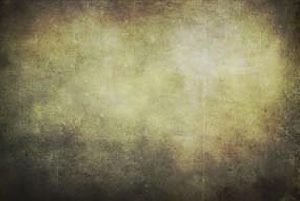
Textures are usually a photograph or a scan of another image, such as peeling paint, distressed or scratched surface and even vintage paper. These textures can be added on top of your own photo and merged with it by changing the blend modes and opacity level settings. In addition to bringing a layer of depth to your image, these textures often introduce the illusion of dust, dirt, stains and creases to the photo and create a final grungy and dramatic appearance.
© Nitsa Malik
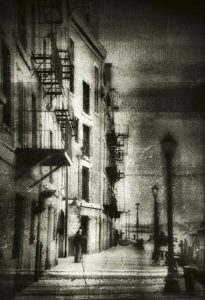
While textures are usually a photograph or a scan of some textured surface, they don’t have to be. In fact textures can be any image that you wish to apply and blend with your photo to give an extra dimension of vintage, distressed or painterly appeal.
The texture can be made on the computer, as many of the existing graphics programs offer tools for making such textures and backgrounds. But, it is incomparably effortless to simply scan homemade textures or designer papers (sometimes called scrapbooking or decorated paper). Often, people prefer to photograph found textures such as peeling paint, leaves, fabrics, rust or scratched surfaces, which they capture with their digital cameras and set as backgrounds for their images.
Whatever textures you chose for your artwork, you will blend them in your photo editor on different layers so that your photo will act as the background layer. Then you’ll play around with the Transparency and Blend mode settings to let the textures show through your images.
© Nitsa Malik
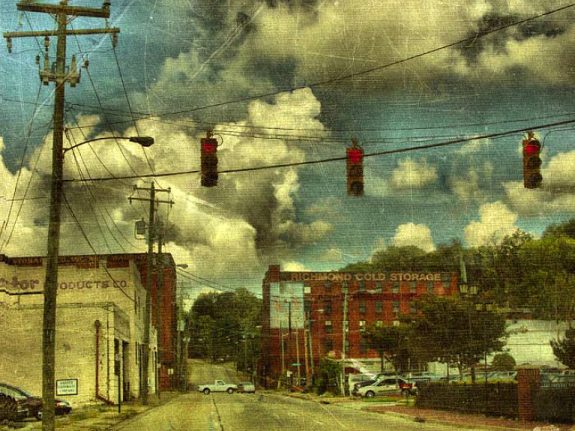
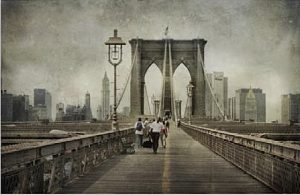
The texture used for the picture above came from the back cover of an old book which was scanned and used as a background for a photo taken in Richmond, Virginia. The book cover comes from a vintage book (I Claudius by Robert Graves,) which was printed in 1932. It works well as a texture owing to it’s distressed surface. Scanning a book cover or any other found texture around your home is a creative way of re-using and re-purposing materials. It also proves that textures can be easily found if you just look around.

© Nitsa Malik
Here’s a quick Photoshop texture tutorial that gives you an idea of how easy this technique is. Even some basic imaging programs now offer the opportunity to use layers so you don’t need Photoshop; in fact Photoshop Elements and others will do just fine.
© Nitsa Malik
1. Open the photo of your choice and the texture you are going to use in Photoshop. Photos with lots of sky or plenty of light areas work best and have the greatest effect.
2. Make sure your photo has enough contrast by adjusting the levels of brightness and contrast. Go to Image-Adjustments > Brightness/Contrast and adjust the settings by moving the slider.
© Nitsa Malik
3. Select the texture image by clicking on All in the Select menu. Now that the texture is selected (with the marching ants around it) copy it (Edit > Copy) and paste it on top of your photo (Edit > Paste).
4. Make sure the layers palette is open (Window > Layers). Change the Opacity and Blend Mode until you like the effect There’s no formula for this– it’s simply what appeals to you.
© Nitsa Malik
5. Print out your image. If you want to fine tune it, simply go back and try different combinations of Opacity and Blend. That’s all there is to it. NOTE: Make your texture image the same size as your photo before copying and pasting.
If you have never used layers don’t be intimidated. There are many excellent layer tutorials on the web and YouTube. Remember, to begin with, you only need to use two layers which greatly simplifies matters.
As you get comfortable with the process, you can insert as many layers as you wish and don’t have to limit yourself to one type of texture. Many times combining multiple texture layers will give your picture an unique “edge” that will turn your photo into a beautiful work of art.
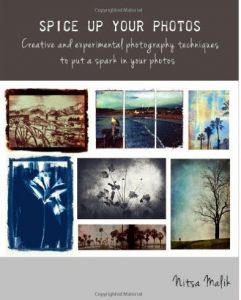 This article is an excerpt from Spice Up Your Photos by Nitsa Malik. Nitsa is a creative and experimental photographer from Israel who now lives in California. The 104-page book covers inkjet and image transfers, texture layering, hand coloring photos and other creative alternative photography techniques. Start here for a fascinating journey into Nitsa’s world.
Subscribe to Red River Paper’s Newsletter for Great Deals!
Original Publication Date: October 30, 2022
Article Last updated: September 14, 2023
Comments are closed.


Categories
About Photographers
Announcements
Back to Basics
Books and Videos
Cards and Calendars
Commentary
Contests
Displaying Images
Editing for Print
Events
Favorite Photo Locations
Featured Software
Free Stuff
Handy Hardware
How-To-Do-It
Imaging
Inks and Papers
Marketing Images
Monitors
Odds and Ends
Photo Gear and Services
Photo History
Photography
Printer Reviews
Printing
Printing Project Ideas
Red River Paper
Red River Paper Pro
RRP Newsletters
RRP Products
Scanners and Scanning
Success on Paper
Techniques
Techniques
Tips and Tricks
Webinars
Words from the Web
Workshops and Exhibits
all
Archives
March, 2024
February, 2024
January, 2024
December, 2023
November, 2023
October, 2023
September, 2023
August, 2023
May, 2023
more archive dates
archive article list


