Shooting The Stars, Part 3: Post Production
By Ron Risman–
Finishing Your Image
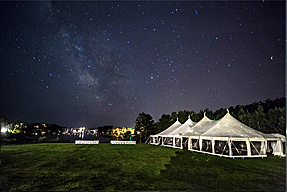
Original image before post processing has been applied. © Ron Risman
As good as your image may look straight out of the camera, it’s really not finished yet. Since I shoot using RAW, the image is captured with a very flat profile. It lacks contrast and sharpness and can easily be brought up to wow status using Adobe Camera Raw (ACR), Adobe Lightroom, or other image processing packages.
Once you import your images into Lightroom or ACR select one of your images and jump into the “Develop” module of Lightroom by hitting “D” on the keyboard. The first setting I adjust in the Develop module is located under the “Lens Correction” tab on the right-hand panel. In the Profile section I turn on “Remove Chromatic Aberration” and “Enable Profile Corrections”. These two check boxes will read the lens data from the image file and will correct for any vignetting (color fringing or light fall-off in the corners) that may be present.
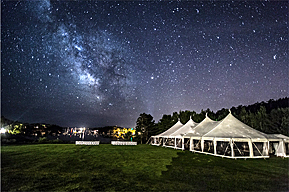
Post processing can bring out beautiful image detail in the night sky. © Ron Risman
After turning on these two check boxes I’ll then start back at the top of the right hand column in the develop module, and will adjust sliders to make the image come alive. I now work from top to bottom, starting with white balance correction (if needed).
I usually test each slider to see if they can help. If they can’t I leave them alone and continue working down to the next slider. Small adjustments of each slider can have a big impact on your image, so don’t go overboard.
If you want to compare your current adjustments against the original image a quick press on the backslash key (usually located above the right “Enter” key) will let you toggle back and forth.
From here you can either print or export your final image. To export I usually jump back to the Library module’s grid view by pressing “G” on the keyboard. Click “Export” on the lower left corner and a Export box will open. Under “Export Location” I select the folder where I want to export the image and click “Export.” Lightroom will export the file as a JPEG image to the folder location you selected. You can also scroll down before exporting and change the images export size, quality, add sharpening, watermarks, and so on.
NOTE: If you use Lightroom to work on JPEG images shot in RAW+JPEG mode, turn on “Treat JPEG Files Next To Raw Files As Separate Photos” in Preferences; otherwise Lightroom will only load in the RAW versions.
Capturing Star Trails
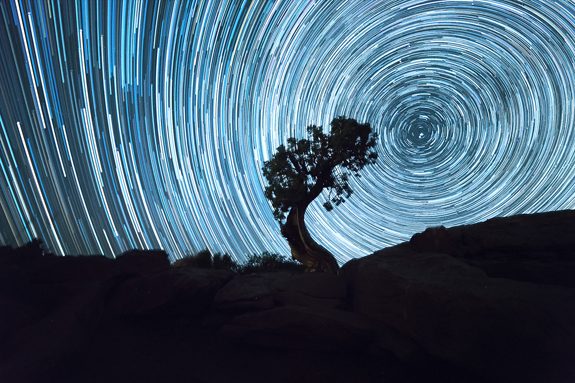
Capturing star trails is another fun way to illustrate the rotation of earth in a photograph. © Ron Risman
Single Timed Exposure
With film cameras, star trails photographs were usually captured in a single timed exposure that might have lasted anywhere from 15 minutes to well over an hour. Today with digital photography the single exposure method isn’t really the best solution since sensors introduce hot pixels as they heat up, and a 60 minute exposure can really make for a noisy image. If you turned on Long Exposure Noise Reduction in the camera – then the camera would take a second 60-minute exposure immediately after the first exposure and would help to remove most, if not all, of these hot pixels. But who wants to wait two hours to find out if something was set wrong?

Intervalometers are available wired or wireless and are not expensive. This model is made by Satechi.
Interval Exposure
Since digital cameras make it affordable to shoot hundreds of shots, the best way to capture star trails is to use an intervalometer and set it up to shoot sequential images using the same settings used to capture the first image. Once you have checked the focus, composition, and exposure of the first image, the intervalometer will trigger each subsequent image using those same camera settings. Once the images are captured you can bring them into a free programs such as StarStax, (see RESOURCES for links) which will stack the images and turn them into a star trail photograph.
Setting up a Star Trail Shot
With a wide-angle lens attached, set up your camera so that it faces the North Star (Polaris). I use an application called Sky Guide to help me locate objects in the night sky. Keeping Polaris near the middle of the frame will help to create a near-perfect circular star trail effect (as shown above).
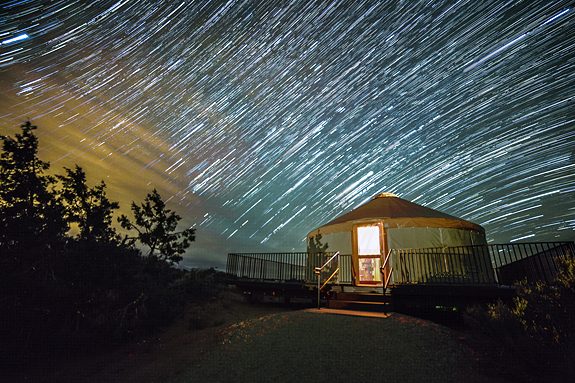
If you aim away from Polaris you’ll get straighter trails or lines that bend near the corners of the image. Different camera angles will provide for different looks. © Ron Risman
Executing the shot
Set up your camera the same as you would for a standard night sky photograph (30-second shutter speed, f/2.8 aperture, ISO 2500-3200, manually focused and with the White Balance of your choice).
I normally set the intervalometer to take a photo every 35 seconds. Assuming I set the camera’s shutter speed to 30 seconds this would give the camera 5 extra seconds to write the image to the memory card and prepare for the next shot. I also set the intervalometer to 60 minutes, which will provide a nice star trail effect when stacked using StarStax. Over this hour your camera will capture just over 100 images, so you’ll want to make sure your memory card is large enough. If not, you can always set your RAW dimensions to a smaller size (M-RAW, S-RAW) so that they take up less room on the card.
Using StarStax
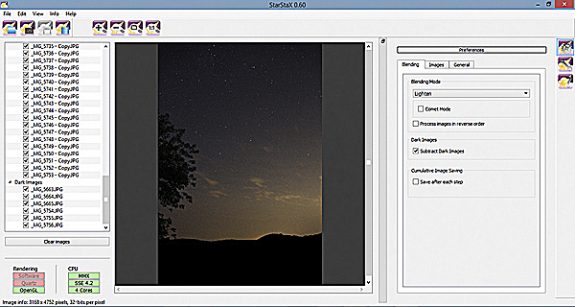
StarStax accepts .jpg and .tif files so you must either export your RAW files from Lightroom or shoot RAW+JPEG and use the JPEG images for creating trails in StarStax.
Open StarStax and drag in the folder that holds your JPEG sequence. The right panel of StarStax (Preferences) is where you select how the program ‘stacks’ your images. In the blending panel I normally select “Gap filling” and turn on Comet Mode.
Now click on the “Start Processing” icon (4th one over from the top left) and the program will stack the images into a star trail photograph. A 100 image set should take approximately 30 seconds to process. To save the star trail photograph select “File – Save As” from the top menu and save the image to a folder on your computer’s hard drive.
I hope this article helps you get started with astrophotography. If you have any questions use the Comments section below or contact me on Facebook and I’ll be happy to answer them.
RESOURCES
Best Paper For Printing Star Images
Glossy Photo Metallic Inkjet Paper
Free Image Stacking Applications:
About Ron Risman
Ron Risman is an award-winning cinematographer and founder of Timelapse Workshops. His client list includes Land Rover, Liberty Mutual, Restoration Hardware, itteQ! Japan, Scorpion Helmets, Revit! Sports International, Berklee College of Music, FOX CT News, and WFTV-9 Orlando. Ron’s work can also be seen in the Emmy award winning film “National Parks Symphony – The Mighty Five”, and in the HBO Documentary “The Crash Reel.”
Ron’s upcoming workshops include a 3-day advanced “night-sky” timelapse workshop in Moab, Utah from May 22-26, 2017 and a 4-day motion control timelapse workshop from May 26-31 2017. You can get more information about his workshops at: TimelapseWorkshops.com
Contact Ron at: Facebook: http://www.Facebook.com/risman
To see more of his work visit these sites: Instagram: http://www.instagram.com/timeographer
Vimeo: Vimeo.com/Risman
Portfolio Site: RonRisman.com
500px: https://500px.com/timeographer
Original Publication Date: March 19, 2017
Article Last updated: March 19, 2017
Comments are closed.


Categories
About Photographers
Announcements
Back to Basics
Books and Videos
Cards and Calendars
Commentary
Contests
Displaying Images
Editing for Print
Events
Favorite Photo Locations
Featured Software
Free Stuff
Handy Hardware
How-To-Do-It
Imaging
Inks and Papers
Marketing Images
Monitors
Odds and Ends
Photo Gear and Services
Photo History
Photography
Printer Reviews
Printing
Printing Project Ideas
Red River Paper
Red River Paper Pro
RRP Newsletters
RRP Products
Scanners and Scanning
Success on Paper
Techniques
Techniques
Tips and Tricks
Webinars
Words from the Web
Workshops and Exhibits
all
Archives
March, 2024
February, 2024
January, 2024
December, 2023
November, 2023
October, 2023
September, 2023
August, 2023
May, 2023
more archive dates
archive article list


