Make Big Images With Small Desktop Printers
By Christine Pentecost–

A stunning 24×30-inch image from a small desktop printer. Framed properly, it can sell for $750 or more. Photo © Christine Pentecost
I have a beautiful, scenic image in my collection that begged to be displayed larger than could be output by my desktop printer– which only can use letter-sized paper. Surely, I thought, there must be some way to solve this problem and, as it turns out, there is.
Image Splitter is a very simple-to-use (and free) software program that takes an image and quickly divides it into sections which can then be sized to your preferred dimensions. Using this application, you can get huge images– even big enough to cover a wall! Here’s how I used it to print that stunning landscape.
I wanted my final image size to be 24×30 inches, with each section sized to 8×10. To achieve this, I simply uploaded my photo file (which I had sized at 24×30) then clicked on “Split Image” which is at the upper left of the screen after your photo has uploaded. You will also see the “rows” and “columns” section, for entering the number of rows and sections you want.
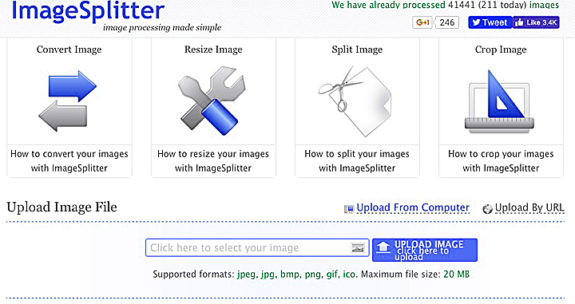
Free, fast and secure, ImageSplitter can do many things. You’ll want to click on Split Image.
The program will take most file types (not TIFF, though) and your image file is not retained after the split is made so you don’t have to be worried about unauthorized use. When you upload an image to ImageSplitter, it warns that the maximum file size is limited to 20MB. However, I did not find any problem uploading images that were significantly larger than that.
The problem I did have though, was not being able to see the full mage with all the splits. The dividing lines are very faint (especially in light areas), and while you can move the image around on the screen, it’s hard to see the total effect of where the dividing lines will fall.
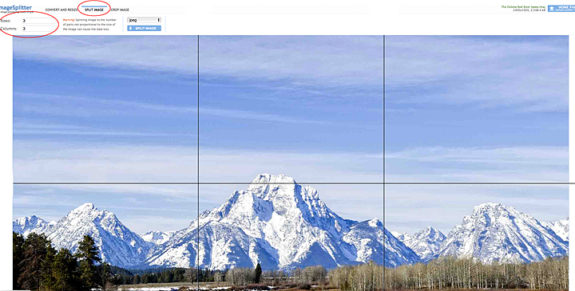
As shown here, you may not be able to see the entire image and how it splits if it is a high-resolution photo. Make a smaller low-resolution copy as a test print, so the entire picture can be seen. Then, noting the settings, upload the high-resolution one using those settings.
I solved that by first sending up my image reduced to 1/3 of my preferred size of 24×30, which was 8×10. To do this, I just made a duplicate of my original 24×30 image, resized it to 8×10 and saved it under a different name, for example, “Test Image.”
I uploaded my 8×10 and split it into 9 sections– 3 wide and 3 high. I was then able to easily move the photo around and see where all of the splits would be. If the split falls on an area where you don’t want it to (for example, the middle of someone’s eye), simply change the number of splits you want until it looks good. Then note down the number of columns and rows, and upload your full-sized image.
Next, I uploaded my 24×30-inch image, and split it into the 9 sections as I had done with the smaller image. Once I clicked on “Split Image,” the image sections were immediately downloaded to my Downloads folder. (This may vary on your computer, depending on how you have your computer set up to handle downloads.)
I then went to my Downloads folder, where I located the folder with the same name as my photo, which in this case was “The Oxbow 24×30”. Inside it were the 9 sections. One at a time, I opened each photo in Photoshop. This is where you will need to resize the image back your preferred size for each section, which, in this case, was 8×10. Even though my original uploaded photo was sized at 24×30 at a resolution of 300 ppi, each section came back at a size of 41.67 x 33.33 inches at a resolution of 72 ppi!
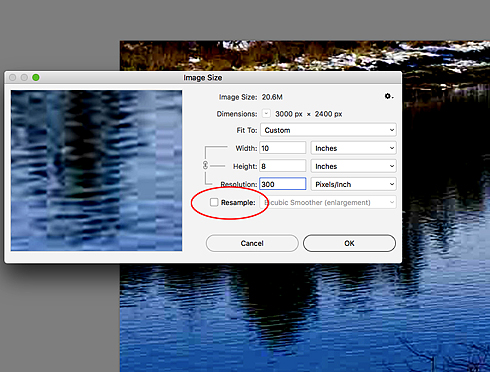
All images will come back to you at 72 ppi. Just uncheck the Resample box and resize it to your original resolution. Or change the size to your original choice and the picture will automatically print at the correct resolution.
Not to worry, because this is a very easy fix. While in Photoshop, you simply go to Image > Image Size. Uncheck the Resample check box (if it is checked), change the resolution of each section back to what you uploaded it at (which was 300 ppi for me) and click OK. When all 9 sections had been resized the same way, I printed each one out.
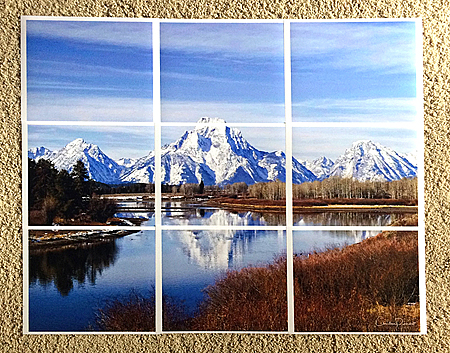
Once the images were dry, I used my white cotton gloves to protect the print, and used my paper trimmer to trim off the white border around each image, leaving me with 9, 8×10 borderless prints.
My next step was to decide how I wanted to mount my photos. After laying the sections out on black mat board, I realized I loved the look of the black background in-between the photo sections. It gave the appearance of looking through a multi-paned window.
I decided to have the print framed and wanted it to really stand out within the frame, so I worked with a local frame shop to create the final product. I had each section dry mounted to 1/4” thick foam core. The sections were then mounted onto black mat board, approximately 1/4” apart from each other, with a ½” border around the edges. Even though there is a black space between each section, it will look like one smooth continuous image.
Here, the individual images have been laid on a white card to check their alignment. Later, they’ll be mounted on black foam core for the final image. They can also be mounted edge-to-edge for a virtually seamless image. Photo © Christine Pentecost
Next, I selected a simple black frame, and opted for museum grade glass, to allow the full beauty of the paper to shine through. It’s important to make sure your framer puts the images in proper order and right side up when assembling the final image.
Be careful not to get the images rotated, especially on skies, where clouds may not match up if the images are not placed in the proper order. You may want to take a quick photo of the images when you first laid them out, for reference, or lightly pencil an “up” arrow on the back of each print.
You can also create one large image without any space in between the sections, which in my case would have been a 24×30 photo. You could purchase a ready-made frame at your local craft store, in the size of your final image. Then, using the backing from the frame and a photo mount adhesive spray, adhere each section to the backing, creating your large format print!
You may want to look for an adhesive that allows repositioning of the photos in case you don’t get them exactly right the first time. You may also want to use a brayer (rubber roller or similar) to make sure no air bubbles get trapped and that the image is lying flat.
My favorite paper for split images is Red River Polar Pearl Metallic. Anything I have printed on this paper really pops, with wonderful detail and color and it is especially suited for split images that form very large prints.
Using ImageSplitter was really an easy way to allow me to have a photo enlargement and, with a fairly inexpensive framing selection, I created a very contemporary piece of art work, not only to hang on my wall, but to offer as an option for clients who appreciate the dramatic effect large images can achieve.
ABOUT THE AUTHOR:
Christine Pentecost is a Red River Pro who lives in Bozeman, Montana and specializes in nature and wildlife photography. Her work can been viewed at her web site and you may also read her Red River Pro profile.
RESOURCES:
Applications
Materials:
Original Publication Date: June 18, 2017
Article Last updated: June 18, 2017
Comments are closed.


Categories
About Photographers
Announcements
Back to Basics
Books and Videos
Cards and Calendars
Commentary
Contests
Displaying Images
Editing for Print
Events
Favorite Photo Locations
Featured Software
Free Stuff
Handy Hardware
How-To-Do-It
Imaging
Inks and Papers
Marketing Images
Monitors
Odds and Ends
Photo Gear and Services
Photo History
Photography
Printer Reviews
Printing
Printing Project Ideas
Red River Paper
Red River Paper Pro
RRP Newsletters
RRP Products
Scanners and Scanning
Success on Paper
Techniques
Techniques
Tips and Tricks
Webinars
Words from the Web
Workshops and Exhibits
all
Archives
March, 2024
February, 2024
January, 2024
December, 2023
November, 2023
October, 2023
September, 2023
August, 2023
May, 2023
more archive dates
archive article list


