How To Print Beautiful Antique Christmas Cards
By Arthur H. Bleich–
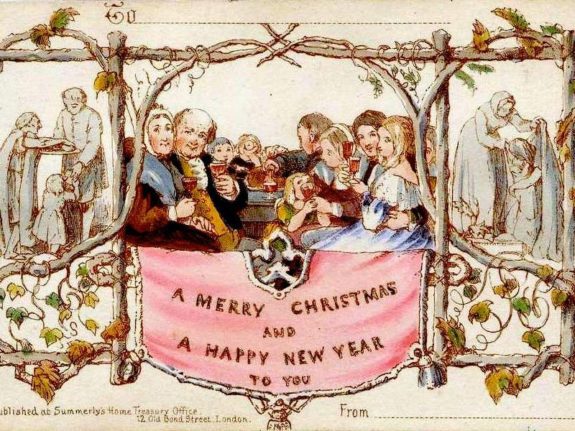
The first Christmas card, 1843. Courtesy of the British Broadcasting Corporation.
The Christmas card-giving tradition began in London in 1843, when Sir Henry Cole commissioned an artist friend, John Horsley, to design a card that could be mailed to his friends. Some say Sir Henry thought up the idea to avoid writing long letters in reply to those sent by friends and acquaintances– an English tradition at Christmastime.
He had a “To___” printed at the top so he could write in his friends’ names– to give it a more personal feeling, and, of course, a “From___ at the bottom. His card’s central picture showed three generations of a family raising a toast to the card’s recipient: on either side were scenes of charity, with food and clothing being given to the poor.
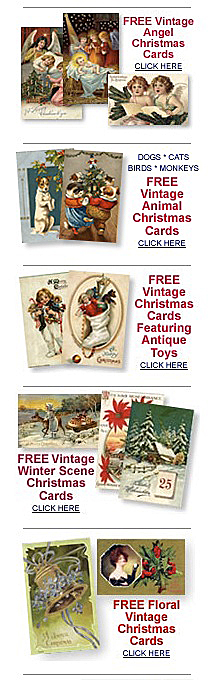
A plethora of free cards awaits you at Vintageholdaycrafts.com and other sites.
Always mindful of commercial possibilities, Sir Henry, who was the first director of the Victoria and Albert Museum, then had a thousand or so cards printed on a lithograph stone and each one hand colored, as was the custom of the times. They were sold for a shilling apiece at a London shop and were an immediate sensation. The idea then spread like wildfire throughout Europe and eventually to the U.S., Canada and the rest of the world.
Many regard Sir Henry as the father of the greeting card industry and today, 174-years later, it’s estimated that only about ten of the original cards remain; the last known one was sold at auction for over £8,469 ($11,355).
Many cards produced during the Victorian Age (1837-1901) are simply exquisite and hundreds (possibly thousands) have been digitized. Most are available from various sources –absolutely free– for you to replicate on your own Christmas cards. Best of all, there is a wide variety of both portrait and landscape orientations.
To make the best use of them, you may have to slightly increase the size of some so they’ll fit Red River Paper’s standard 5×7-inch greeting cards. Here’s how you do it.
Select the card(s) you want and click on them. You’ll usually get a larger image. Then either download that image or just click and drag it to your desktop.
1. Next, open it in an imaging program and choose Image>Image Size.
2. Now check the Resample Image and Constrain Proportions boxes.
3. Choose a size that will fit on the card you are going to print.
4. Enter a Resolution value of 200ppi.
5. Then Click OK.

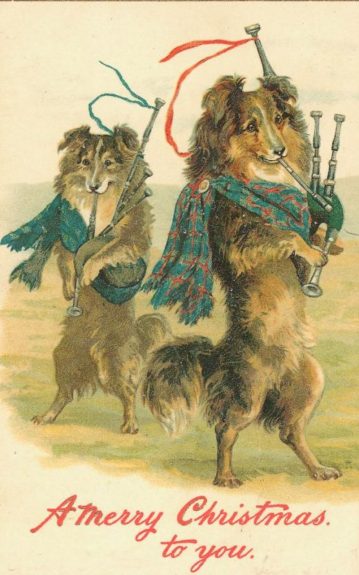
Courtesy of http://vintageholidaycrafts.com
You will now have image that will either fit on one dimension of the card or the other but probably not on both. You now have several choices. You can make the image a bit smaller and put a border around all four sides.
Or you can crop it if it’s a bit too big on either side. Or, as I sometimes do, you can uncheck Constrain Proportions box and enter the exact image size you need to fit the card along with your desired resolution. This will produce a tiny distortion in the image, but it is usually unnoticeable.
Now some of these images may lack adequate color saturation (because they’ve faded over time) and may also be a bit soft (though that’s part of their charm). Here’s what I suggest:
1. First try something simple. Go to Image > Adjustments > Brightness/Contrast. Sometimes moving these sliders this is all you’ll need to “pop” the image up.
2. If necessary, you can also use Image > Adjustments > Hue and Saturation which will give you even more control over the richness (saturation) of the colors and should do the trick.
3. If it has an overall color cast that you want removed, then go to Image > Adjustments > Color Balance which will get rid of it.
4. After the image looks good, try a touch of sharpness to see if it makes the image look better. You won’t need much and even plain old “Sharpen” (under Filter > Sharpen) may be all that’s needed. If you’re comfortable with Unsharp Mask, you can try that instead as it’ll give you more control.
You may have to make several tries at different settings until you hit it on the nose. For example, you may be able to get a perfectly good print from a resolution of 100 ppi. On the other hand, it might take 300 ppi to give you the results you want
Courtesy of http://vintageholidaycrafts.com
What I usually do is write down my settings, run a test print and then scribble the settings on the back. After awhile, you’ll know what settings to use when you make adjustments and it’ll be a piece of cake.
You’ll also want to try some different Red River Paper surfaces. My preferences are Matte and Fine Art papers because they better match the time period in which these images were made and they also minimize minor imperfections. However, this is only a personal preference and as the French say: chacun son goût. So if you haven’t done so already, order a Card Shop Sample Kit and try several to see which surfaces suit your taste.
Sometimes a higher resolution image is available from another source on the web. There’s an easy way to find it through a great, free website called Tineye (See Resources). You just upload the image you’ve chosen and Tineye will do a web-wide search to find all similar images. You can then click around and download those that might have better quality.
Even easier, Tineye also has browser extensions for Firefox, Safari, Opera, Chrome and Internet Explorer that allow you to search for matching web image by simply right-clicking (or control-clicking for Mac) on images in your web browser.
There are so many gorgeous antique card images out there, your biggest problem is going to be choosing which to use. There are also collections featuring every holiday and season from different countries and time periods– and most of them are free!
RESOURCES
Vintage Holiday Crafts Free Antique Cards
Original Publication Date: December 06, 2017
Article Last updated: December 06, 2017
Comments are closed.


Categories
About Photographers
Announcements
Back to Basics
Books and Videos
Cards and Calendars
Commentary
Contests
Displaying Images
Editing for Print
Events
Favorite Photo Locations
Featured Software
Free Stuff
Handy Hardware
How-To-Do-It
Imaging
Inks and Papers
Marketing Images
Monitors
Odds and Ends
Photo Gear and Services
Photo History
Photography
Printer Reviews
Printing
Printing Project Ideas
Red River Paper
Red River Paper Pro
RRP Newsletters
RRP Products
Scanners and Scanning
Success on Paper
Techniques
Techniques
Tips and Tricks
Webinars
Words from the Web
Workshops and Exhibits
all
Archives
March, 2024
February, 2024
January, 2024
December, 2023
November, 2023
October, 2023
September, 2023
August, 2023
May, 2023
more archive dates
archive article list


