Back To Basics: Orientation Can Make Or Break Your Image
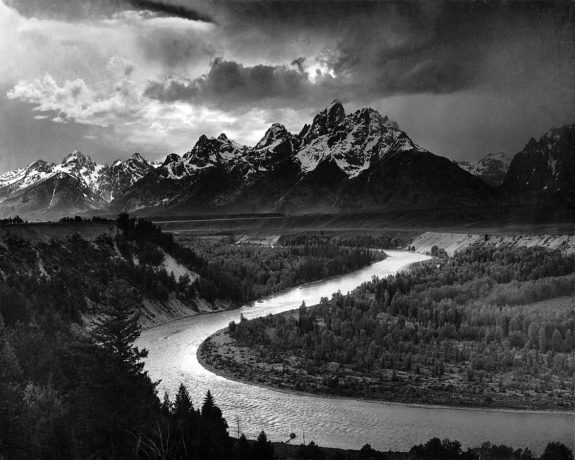
Snake River. Photographed as a horizontal image by Ansel Adams for the U.S. Government.
By Suzanne Williams–
The composition of a photograph is exactly what the word “composition” itself implies. It is the way the objects in an image are “composed”, or we could say, “arranged”. Composition is, for the most part, subjective to the photographer’s eye. The fact is that there are many ways to arrange the same scene.
Think of a well-known photograph. Ansel Adam’s “Snake River” photograph comes to my mind. Many people of all different skill levels have returned to that location and created their own vision of that river valley. Though some may have tried to imitate it more exactly, others have opted to change it, to show it as they personally saw it. Neither choice was incorrect, but both made decisions on how they wanted their photograph to appear.
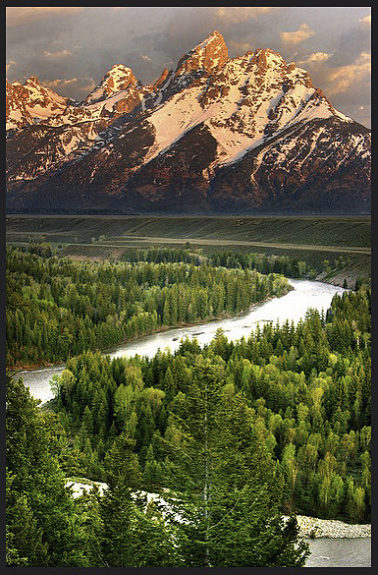
Sunrise, Snake River. The same location but shot as a vertical image, in color and with a lens of a different focal length. Photograph © Rob Kroenert.
Where photographic composition is required, there are a few general rules that apply. These rules are also greatly subjective. Often, I hear people talk of “breaking the rules” and going “outside the box” when setting up a photograph, and there is definitely a time for that. However, I always caution, especially new photographers, to learn to follow the rules first, before deciding to “break” them.
It is essential for the rules become like a habit. I can describe what I was thinking, how I made my decisions, for most of my photographs. Yet the truth is, I did not spend much time thinking when I made those decisions. It is more that I have done it so often that it has become as easy as blinking. This can be said of any sport or hobby, which a person repeatedly practices. The choices a long-distance runner must make to complete a marathon, or a bicyclist must remember during in a race, are quickly decided when they have continually made them. Once they have learned their craft, they are then able to change their choices as the situation presents itself. Yet first, they grounded themselves on the basics of the sport.

This image was originally shot as a vertical but then the photographer felt it would be more eye-catching as a horizontal. Always shoot both ways. Don’t rely on cropping afterward because it won’t always work. Photograph © Arthur H. Bleich
HORIZONTAL OR VERTICAL?
The first and most obvious rule of composition is in choosing a horizontal or vertical image. Horizontal images are perhaps the most common. It is natural to lift up the camera and hold it as it was made to be held. And horizontal images do have their place. There are photographs that benefit with additional space on either side of the main object – city scenes, sweeping landscapes, and sports activity – are three examples. On the other hand, there is also a time when a picture is better staged vertically. The most obvious example of vertical staging is tall, thin objects like trees or buildings. Sky images are another great example.
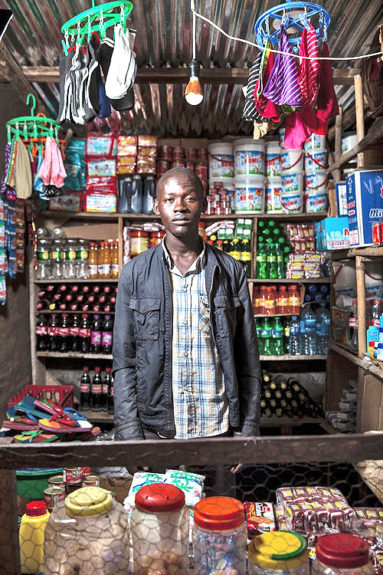
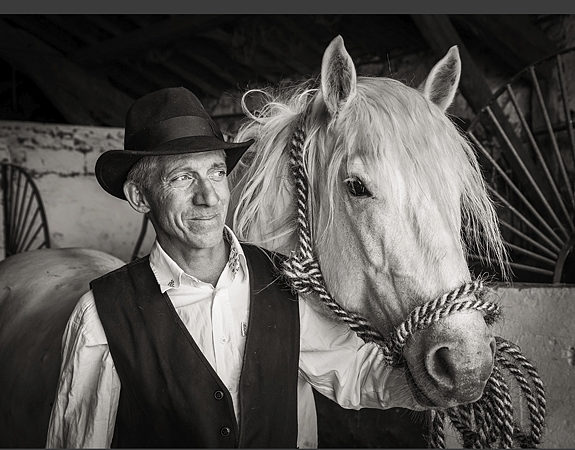
A perfect environmental portrait, shot vertically with the subject centered. Photograph © Andrew Slaton
WHAT IS BIGGEST?
The easiest way to figure out which format would work best is to ask yourself a question, “What in this photograph do I want to be biggest?” Think of a sky image again. Do you want to feature more of the landscape of the area, rolling hills, an immense forest? Or is the sky itself the main focus, with towering clouds and glancing rays of sunlight? If you want to show the size of the objects in the landscape, then perhaps horizontal would work better. However, if the height of the clouds is more your goal, then try vertical. I find that by thinking of what is “biggest” in the image, I can focus myself on which format works best.
LOOK AT THE LINES
Another method of decision involves the lines in the photograph. Lines in themselves are a great compositional tool. Every photograph has lines in it somewhere. Now, they do not have to be arrow-straight necessarily. Curves are also lines. But ask yourself, “In what direction are these lines pulling the viewers eye?”
Your “longest line” should determine the format of the image. Take, for instance, a photograph of a towering tree. You are standing at its base and looking directly upward. Where is the longest line in this image? Is it the tree trunk itself? To properly give the viewer a “feel” for its height a vertical format might work best. Now think instead of an ocean shoreline. The longest line in this image might be the diagonal line of the waves hitting the beach. Paying attention to the lines in a photograph is a great way to decide on format direction.
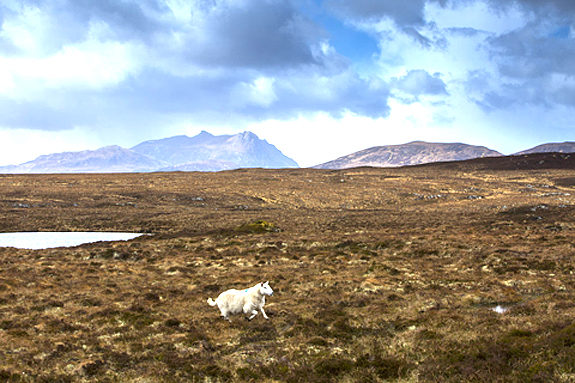
Leave room for your subject to roam. Photograph © Andrew Slaton.
GIVE IT SOMEWHERE TO GO
Here’s a simple way to decide on a horizontal or vertical format. When photographing a particular object, especially if it’s a moving object, give the object “somewhere to go”. You never want your main subject to appear crowded. This can be distracting to your viewer. You also do not want to “cut off” your subject where it appears to be “smashing” into the edge of the photograph. Instead, leave a little space in whatever direction it is heading.
Now, your main subject does not necessarily have to be a living one. As an example, consider a lighthouse sitting atop a tall cliff, falling away to the sea far below It still has a direction. It is possible to crop your photograph too much to the left or right, or the top or bottom, and leave the lighthouse building too crowded.
Notice also that I also mention the top and bottom of the image. If the scene you are trying to capture lends itself to more space over or under the object that is another great guide to choosing vertical over horizontal. Now I know there is a time to break this rule. I have seen it done successfully and well, but always remember foremost to learn to follow the rule before you break it.
The photographer first shot this as a vertical but then, moving in, he also shot it as a horizontal. Always shoot both orientations. Photograph © Tony Bonanno.
ALWAYS MIX IT UP
Using the two Snake River images as examples, the best way to capture many scenes is to include both horizontal and vertical images. Try different angles and different levels of telephoto (zoom in or out) while changing from horizontal to vertical. The overall picture of a location is often best seen through many photographs, not just one. I like as much to see the closer, more intimate images of a spot as I do the “big picture”.
The composition of a photograph can “make or break” an image, and the first choice is usually horizontal or vertical format. Start by taking one from each direction, then later view them side-by-side. It is through practice and constant observation that you will learn what works best. Soon it will become easy to make on-the-spot choices and achieve excellent composition.
About the Author
Suzanne D. Williams is a best-selling author of both nonfiction and fiction books with an avid interest in photography. She also writes devotional and instructional articles and does graphic design for self-publishing authors. Click here to visit her website.
About The Photographers
Rob Kroenert is traveling the world. Follow him here.
Arthur H. Bleich is a Red River Pro. Read about him here.
Andrew Slaton is a Red River Pro. Read about him here.
Tony Bonanno is a Red River Pro. Read about him here.
To subscribe to Red River Paper’s newsletter, click here.
Original Publication Date: April 29, 2018
Article Last updated: April 29, 2018
Comments are closed.


Categories
About Photographers
Announcements
Back to Basics
Books and Videos
Cards and Calendars
Commentary
Contests
Displaying Images
Editing for Print
Events
Favorite Photo Locations
Featured Software
Free Stuff
Handy Hardware
How-To-Do-It
Imaging
Inks and Papers
Marketing Images
Monitors
Odds and Ends
Photo Gear and Services
Photo History
Photography
Printer Reviews
Printing
Printing Project Ideas
Red River Paper
Red River Paper Pro
RRP Newsletters
RRP Products
Scanners and Scanning
Success on Paper
Techniques
Techniques
Tips and Tricks
Webinars
Words from the Web
Workshops and Exhibits
all
Archives
March, 2024
February, 2024
January, 2024
December, 2023
November, 2023
October, 2023
September, 2023
August, 2023
May, 2023
more archive dates
archive article list


